Marking And Measuring Tools
The common operation performed by these tools include marking, measuring, setting out angle and parallel lines and testing. All tools do not perform every operations but all those tools which do one or more of these operations are grouped together in this category. The tools included in this group are described below.
Steel Rules
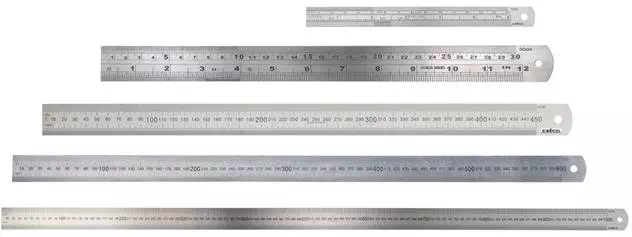
Steel scales or rulers are essential to have in both six inch and 12 inch lengths. This type of measuring device is typically used for sheet metal layout, and for taking measurements where extreme precision is not required. Scales are made of either a tempered carbon steel or a satin-finished stainless steel, and are available in both flexible and rigid form. The flexible scale typically has a thickness of about 0.015 inch, while a rigid scale is about 0.040 inch thick.
Scales are graduated in exact portions of either a metric measurement, or a fractional measurement. Scales with fractional graduations are typically divided into increments of 1/32 inch on one side and 1/64 inch on the other side. A decimal scale is usually divided in tenths or fiftieths of an inch on one side while the other side is divided in increments of 1/ 100 inch. Metric graduations are measured in centimeters and millimeters, and are often included on the same scale. Since it is sometimes necessary to convert from metric to fractional or decimal form and vice versa it is a good idea to keep a conversion chart with your layout tools.
Because the end of a metal scale is not precisely cut, the cut, or factory end should not be used as a measuring guide. Instead, you should always begin measuring somewhere after the first few markings on a scale to ensure a correct measurement. The one inch mark is typically used as the starting point because it is easily subtracted from the final measurement.

Combination Set
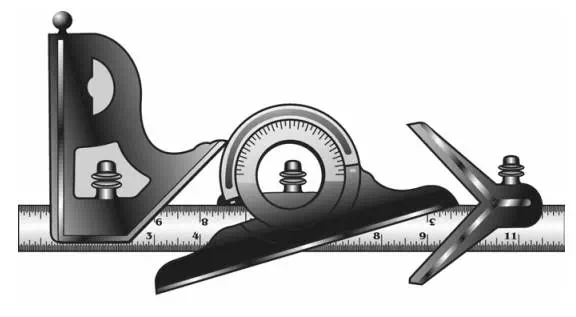
It is a very useful instrument having a combination of five different instruments in one, thus facilitating a fairly wide range of uses, It consists of a steel scale graduated in inches and its parts or centimeters and millimeters. It is available in varying lengths from 20 cm to 60 cm. A groove, midway between its width, runs along its full length. At its one end is provided a flat square which enables its use as an engineer's try square in testing and setting right angles and also as a depth gauge. A bevel protractor provided at the middle carries a spirit level. The latter enables its use for testing trueness of flat surfaces and the former as a bevel protractor for setting, testing, marking, measuring and duplicating different angles. A centre-square provided at the other end is used for locating centres at the end faces of round bars, avoiding the use of V-block, etc. All these attachments can be used simultaneously or separately, or as a combination of two or more, depending upon the requirement. All the attachments are provided with nuts and screws to lock them in position. These nuts carry knurls at their outer surfaces, as shown in the diagram, to provide a firm grip during screwing and unscrewing. A combination set is shown in Fig. below, and a few typical applications of it are shown.
