Target teach method
There are two different
ways, the first one by using Target teach Icon and the second one is by using
Virtual flex pendant, by choosing teach Target you can create path easier than
virtual flex pendant, but I will try to give small introduction on both ways
and the user has the choice to choose the suitable way for creating the path.
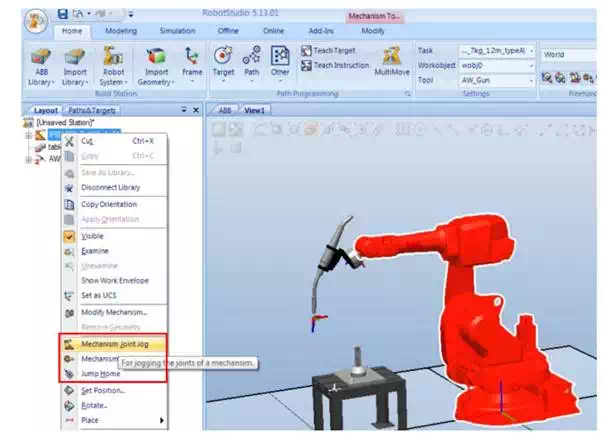
First we right click the robot from home ![]() layout then we jump
home like we mentioned in the previous tutorial, then we clicks on mechanism
joint jog and we move the robot joint space (watch picture11).
layout then we jump
home like we mentioned in the previous tutorial, then we clicks on mechanism
joint jog and we move the robot joint space (watch picture11).
Picture 11 (robot studio screenshot)
Robot movement options
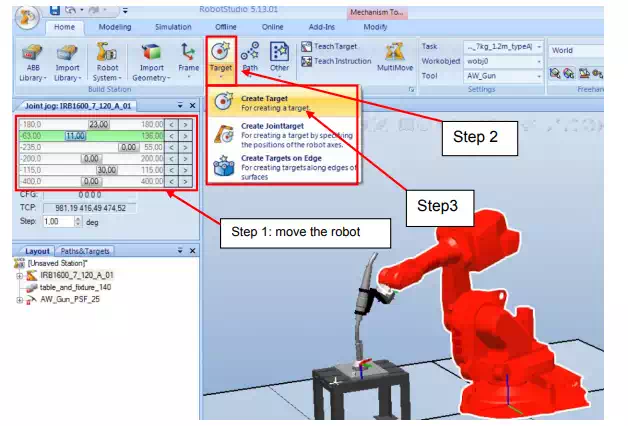
Move the robot joint the first desired motion the go up on the icon target in home section then we choose create target icon then it will open new window like in picture12.
Picture 11 (robot studio screenshot)
How to create path by choosing Target
Picture 12 (robot studio screenshot)
How to create path by choosing Target
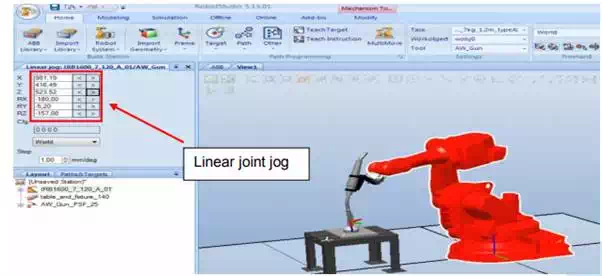
We go back to first step
to repeat the same process again by right click the robot from home ![]() layout
then we click on mechanism joint jog or linear joint jog like we mentioned in
the previous tutorial.
layout
then we click on mechanism joint jog or linear joint jog like we mentioned in
the previous tutorial.
Picture 13 (robot studio screenshot)
Moving linear joint
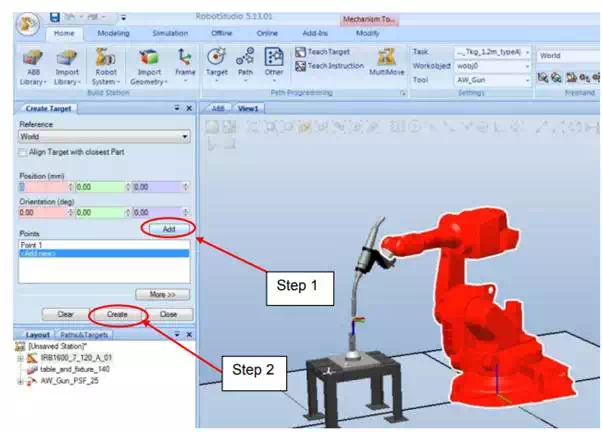
Repeat step3 by clicking create target then add new point after that go down and choose create , then the previous move you have done is saved by the system. We repeat the same again and again until the path point is completely created. When we open the tree of IRB on the lift in paths & targets section we will see that we have target 10, target 20, target 30, ……target n. Now we create an empty path then we drag targets to the new path (watch picture 15).

Picture 14 (robot studio screenshot)
Creating empty path
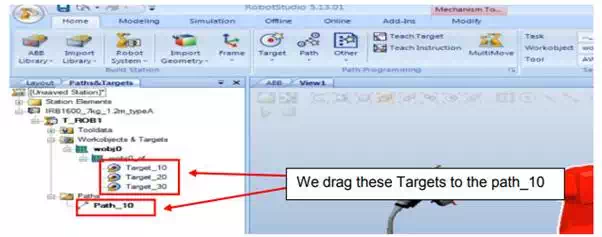
Picture 15 (robot studio screenshot)
Dragging Targets to the path
Up we will see path tools and modify button under it. Select modify button and new list up will open, search the icon move along path and the robot will debug for few second and robot should move according to the trajectory which is planned or created.
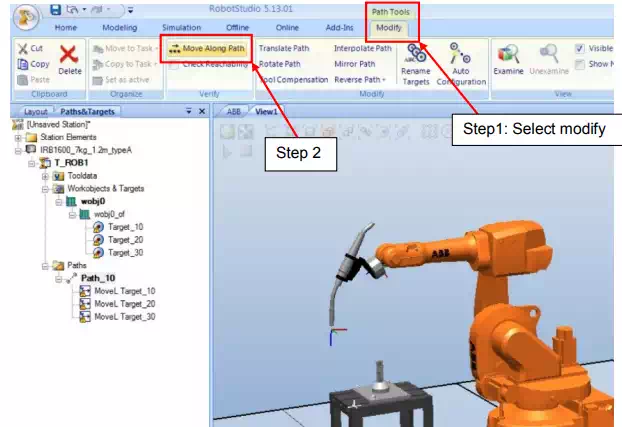
Picture 16 (robot studio screenshot)
Robot simulation