Trajectory Planning By Using Robot Studio
Introduction
In this section I will try to give brief introduction about how we can create path using robot studio through using simulation and virtual flex pendant since they are two different ways, so I will try to explain each way separately beside give introduction about how we can choose from ABB Library geometry and tools and how we can set their position in robot environment.
Creating new station and saving it
First we need to choose any robot type by clicking ABB library (watch picture 1)
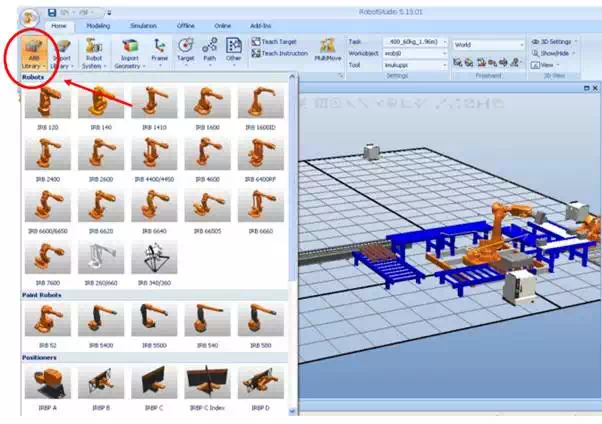
Picture 1 (robot studio screenshot)
How to open new station and to choose robot from ABB library
Select the Icon import library then select equipment then you go down and select any tool by clicking any tool for example I will choose any end effector tool from the library (watch picture 2).
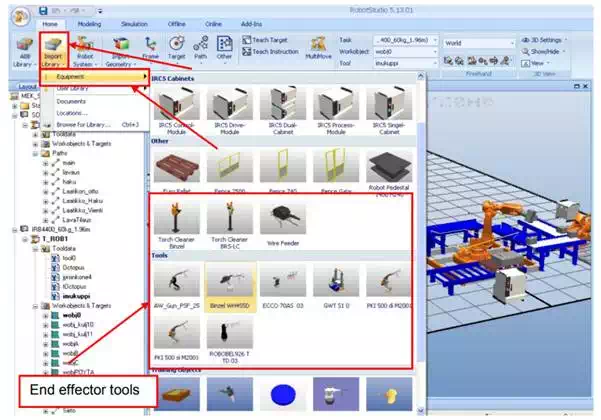
Picture 2 (robot studio screenshot)
How to select from ABB library end effector tool and some other geometry
Then on the left tree you will see the tool name, but it is not connected to robot’s end effector on the right window, so by dragging the tool name (PKI_500_di_M2001) and drop it to your (IRB1600ID_4_5_150_03) robot then new window will open to ask you (do you want to keep the current position of the tool) then you should choose no then the tool will be connected to the end effector of the robot (watch picture 3).
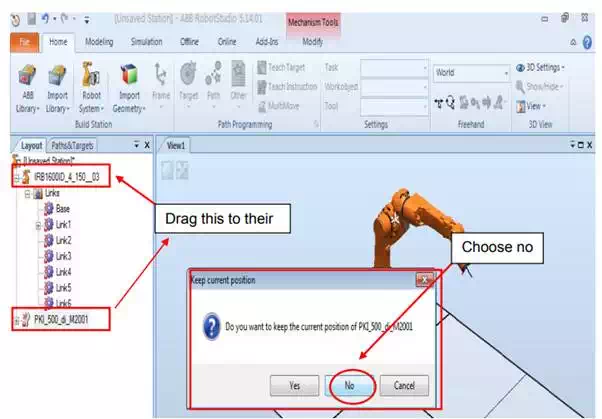
Picture3 (robot studio screenshot)
Example to explain how to connect end effector to the robot
Now you need to select geometry or table, you need to click on import library then Equipment follow the arrow and choose any table by clicking the object then it will appear on red on the robot environment (watch picture 4).
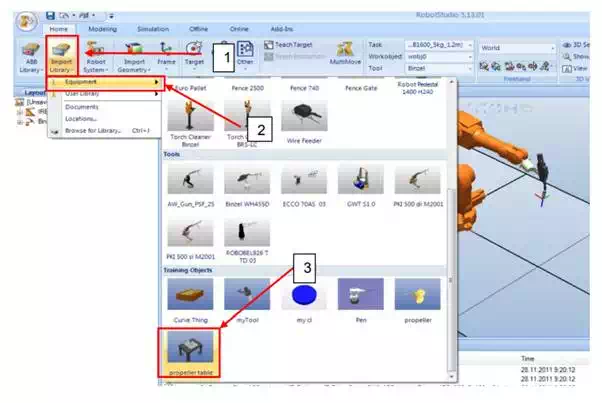
Picture 4 (robot studio screenshot)
How to select table or some other geometry from ABB library
We need to change the position of the table by clicking from home section move order from freehand group button the will appear x and y cross line and we can move by dragging the arrow head right or left and up and down, but this way is not precise and I don’t recommend to use it.
To get precise position to your geometry look up on the program you will see highlighted button name part tools and under it there is modify button, click modify button so new tool bar will open then search the button set position and after that you can choose any coordinate you need for your table position after that you need to click apply to activate changes (watch Picture 5).
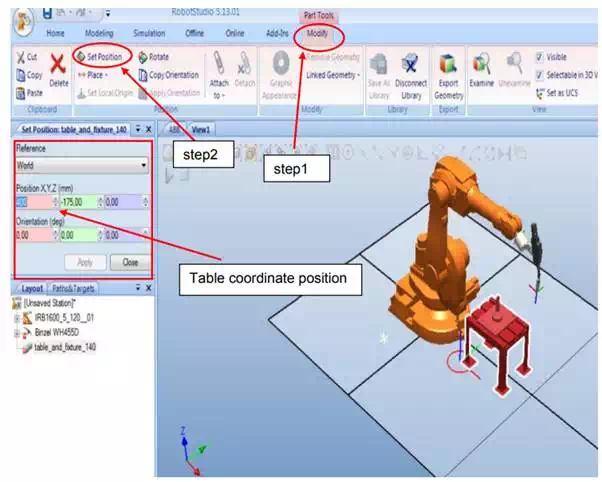
Picture 5 (robot studio screenshot)
How to change the coordinate of the table position through set position icon
Now you need to save the station by clicking up in the left side corner by selecting save as then new window will open to rename your station and to select where to save your station.
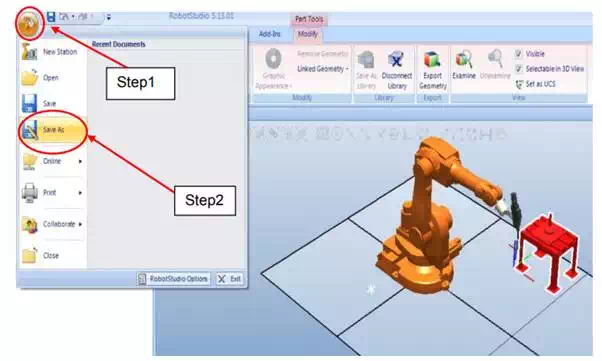
Picture 6 (robot studio screenshot)
How to save new station
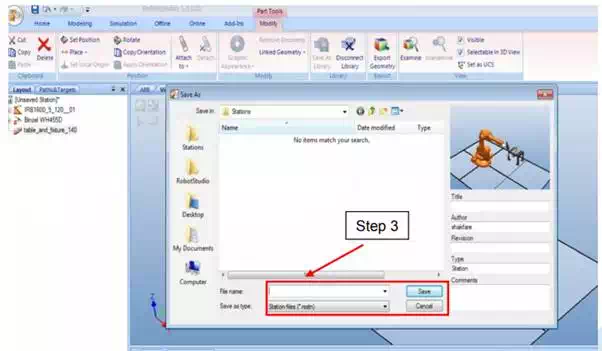
Picture 7 (robot studio screenshot)
Giving a name the station and to choose location on the computer to save it