How to Test LED Lamps
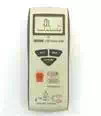
Anybody experimenting with robotics will need to know how to test an LED light. For this, one requires a multimeter and the particular LED to be tested. Obtaining the voltage consumption of the LED will aid one in assessing the required battery life needed to sustain the circuit.
Testing an LED with a Multimeter
In previous topic about LEDs, the distinct details of the LED is discussed . Now, lets see their practical use.
Although you can easily test an LED by connecting it to a circuit and seeing if it will light up, you can also use a multimeter with a diode test function to test an LED and discover a few more things about it too.
How to Test a Diode with a Multimeter
1. Connect the black lead to the COM terminal on the multimeter.
2. Connect the red lead to the Ω terminal, unless your particular model differs.
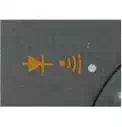
3. Turn the dial to the diode symbol on the multimeter. This allows for electric current to travel in one direction (the arrow) and not the other.
4. Turn the multimeter on. The display window should indicate either 0L or OPEN.
5. Choose a regular red LED.
6. Connect the black probe to the cathode end of the LED, which usually is the shorter end and/or cut flat at its bottom. Connect the red probe to the anode end of the LED.

Interpreting the LED Test Results
If it occurs that the multimeter display doesn’t change from 0L or OPEN, then it may be that you connected the probes in the wrong order, or that the connections are not secure. Make sure the steps above are followed accurately. Otherwise, it may indicate that the particular LED is damaged. If the voltage in the display is below 400 mV, then it is possible that the cathode and anode are touching, or the probes are touching. This is termed a short circuit—when current passes directly from the cathode to the anode, instead of passing through the LED.
If the steps are followed properly and the LED is undamaged, however, the display should indicate a value of approximately 1600 mV.
When you are testing your LED, take notice of its brightness. If you are already in a lit room, then shade the LED with your hands. A lower efficiency LED will grow dimly, or may just gleam faintly, whereas a higher efficiency LED will glow clearly.
LED Forward Voltage Drop
The value displayed on your multimeter is called the forward voltage drop. This indicates the quantity of voltage used up by the LED, or dropped, when current is traveling in the appropriate direction, forward.
This kind of data is extremely useful when it comes to building your own robot or designing your circuit board. You will definitely need to keep track of the total voltage used by your robot, whether it is from a LED or some other component, in order to choose a battery strong enough to power it. Therefore, it is equally important for you to purchase the LEDs that your battery can sustain. Usually, you should not purchase an LED with a forward voltage exceeding 4V, because most robotic circuits can not function at such voltages.