Penetrant Removal Process
The penetrant removal procedure must effectively remove the penetrant from the surface of the part without removing an appreciable amount of entrapped penetrant from the defect. If the removal process extracts penetrant from the flaw, the flaw indication will be reduced by a proportional amount. If the penetrant is not effectively removed from the part surface, the contrast between the indication and the background will be reduced. As discussed in the Contrast Sensitivity Section, as the contrast increases, so does visibility of the indication.
Removal Method
Penetrant systems are classified into four methods of excess penetrant removal. These include the following:
Method C, Solvent Removable, is used primarily for inspecting small localized areas. This method requires hand wiping the surface with a cloth moistened with the solvent remover, and is, therefore, too labor intensive for most production situations. Of the three production penetrant inspection methods, Method A, Water-Washable, is the most economical to apply. Water-washable or self-emulsifiable penetrants contain an emulsifier as an integral part of the formulation. The excess penetrant may be removed from the object surface with a simple water rinse. These materials have the property of forming relatively viscous gels upon contact with water, which results in the formation of gel-like plugs in surface openings. While they are completely soluble in water, given enough contact time, the plugs offer a brief period of protection against rapid wash removal. Thus, water-washable penetrant systems provide ease of use and a high level of sensitivity.
When removal of the penetrant from the defect due to over-washing of the part is a concern, a post-emulsifiable penetrant system can be used. Post-emulsifiable penetrants require a separate emulsifier to breakdown the penetrant and make it water washable. The part is usually immersed in the emulsifier but hydrophilic emulsifiers may also be sprayed on the object. Spray application is not recommended for lipophilic emulsifiers because it can result in non-uniform emulsification if not properly applied. Brushing the emulsifier on to the part is not recommended either because the bristles of the brush may force emulsifier into discontinuities, causing the entrapped penetrant to be removed. The emulsifier is allowed sufficient time to react with the penetrant on the surface of the part but not given time to make its way into defects to react with the trapped penetrant. The penetrant that has reacted with the emulsifier is easily cleaned away. Controlling the reaction time is of essential importance when using a post-emulsifiable system. If the emulsification time is too short, an excessive amount of penetrant will be left on the surface, leading to high background levels. If the emulsification time is too long, the emulsifier will react with the penetrant entrapped in discontinuities, making it possible to deplete the amount needed to form an indication.
The hydrophilic post-emulsifiable method (Method D) is more sensitive than the lipophilic post-emulsifiable method (Method B). Since these methods are generally only used when very high sensitivity is needed, the hydrophilic method renders the lipophilic method virtually obsolete. The major advantage of hydrophilic emulsifiers is that they are less sensitive to variation in the contact and removal time. While emulsification time should be controlled as closely as possible, a variation of one minute or more in the contact time will have little effect on flaw detectability when a hydrophilic emulsifier is used. On the contrary, a variation of as little as 15 to 30 seconds can have a significant effect when a lipophilic system is used. Using an emulsifier involves adding a couple of steps to the penetrant process, slightly increases the cost of an inspection. When using an emulsifier, the penetrant process includes the following steps (extra steps in bold): 1. pre-clean part, 2. apply penetrant and allow to dwell, 3. pre-rinse to remove first layer of penetrant, 4. apply hydrophilic emulsifier and allow contact for specified time, 5. rinse to remove excess penetrant, 6. dry part, 7. apply developer and allow part to develop, and 8. inspect.
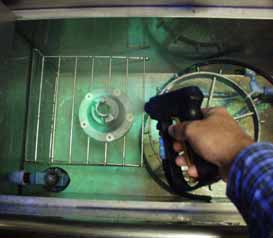
Rinse Method and Time for Water-Washable Penetrants
The method used to rinse the excess penetrant from the object surface and the time of the rinse should be controlled so as to prevent over-washing. It is generally recommended that a coarse spray rinse or an air-agitated, immersion wash tank be used. When a spray is being used, it should be directed at a 45° angle to the part surface so as to not force water directly into any discontinuities that may be present. The spray or immersion time should be kept to a minimum through frequent inspections of the remaining background level.
Hand Wiping of Solvent Removable Penetrants
When a solvent removable penetrant is used, care must also be taken to carefully remove the penetrant from the part surface while removing as little as possible from the flaw. The first step in this cleaning procedure is to dry wipe the surface of the part in one direction using a white, lint-free, cotton rag. One dry pass in one direction is all that should be used to remove as much penetrant as possible. Next, the surface should be wiped with one pass in one direction with a rag moistened with cleaner. One dry pass followed by one damp pass is all that is recommended. Additional wiping may sometimes be necessary; but keep in mind that with every additional wipe, some of the entrapped penetrant will be removed and inspection sensitivity will be reduced.
To study the effects of the wiping process, Japanese researchers manufactured a test specimen out of acrylic plates that allowed them to view the movement of the penetrant in a narrow cavity. The sample consisted of two pieces of acrylic with two thin sheets of vinyl clamped between as spaces. The plates were clamped in the corners and all but one of the edges sealed. The unsealed edge acted as the flaw. The clearance between the plates varied from 15 microns (0.00059055 inch) at the clamping points to 30 microns (0.0011811 inch) at the midpoint between the clamps. The distance between the clamping points was believed to be 30 mm (1.18 inch).
Although the size of the flaw represented by this specimen is large, an interesting observation was made. They found that when the surface of the specimen was wiped with a dry cloth, penetrant was blotted and removed from the flaw at the corner areas where the clearance between the plate was the least. When the penetrant at the side areas was removed, penetrant moved horizontally from the center area to the ends of the simulated crack where capillary forces are stronger. Therefore, across the crack length, the penetrant surface has a parabola-like shape where the liquid is at the surface in the corners but depressed in the center. This shows that each time the cleaning cloth touches the edge of a crack, penetrant is lost from the defect. This also explains why the bleedout of an indication is often largest at the corners of cracks.