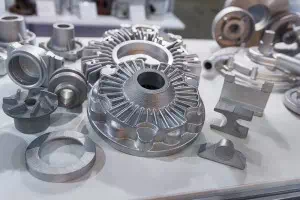
Non-destructive material verification uncovers hidden manufacturing process flaws
 In recent months, manufacturing in the U.S. has
shown consistent gains in terms of employment, productivity and wages. In April
2017 alone, an additional 6,000 manufacturing jobs were added to the
economy, and associated industries that rely on equipment, such as
construction, mining, agriculture and utilities, are keeping manufacturers busy
with new orders both domestically and abroad.
Service providers in the energy sector are familiar with how a rise in manufacturing productivity correlates to an increase in material scrutiny; more machines mean more componentry and more room for manual or automated process error. When material flaws exist on heavy-duty industrial sites that contain chemical and nuclear plants, offshore oil rigs and subsurface infrastructure, for instance, the repercussions can be deadly.
Expert engineers and technicians place a high priority on material verification of each and every manufactured product used on a particular site or for a given purpose. One crater, pinhole leak, void, stress crack or deviation that occurs during the manufacturing process or after the component is brought online equates to production downtime; creating unnecessary risk factors to employees and potential mechanical failures that may increase the risk of the health and safety of all.
Material verification protocols come in many forms, but today’s most in-demand services are of the non-destructive type.
NDT playing a larger role during inspections and risk mitigation.
The underlying factor to consider during any inspection process is how the inspected machine or material was originally intended for use.
Engineers specifically design products to align and serve the purpose of the larger fit, form and function of the product itself. This level of specificity means that every component is inherently complex in its own way, and that traditional manufacturing processes can sometimes inadvertently create long-term structural damage that compounds over time.
For instance, castings used to mold and construct alloys can suffer from:
· Cracks
· Porosity
· Voids
· Inclusions
· Shrinkage
Consequently, alloy forgings may create:
· Laps
· Bursts
· Under- and overfills
· Deflections
· Buckling
These discontinuities are thus passed on to wrought materials in the form of:
· Seams
· Laps
· Laminations
· Inclusions
· Structural deficiencies
All in all, if components have left the production floor at this stage then material verification processes have already failed. If these flaws are not spotted during the mechanical/automated fastening, installation or preliminary testing processes, operators will face enormous consequences.
Imagine the danger of a deformed component making its way into an airplane build or a natural gas pipeline – the potential for loss of life could be large.
With non-destructive testing, however, technicians and service providers are able to inspect and verify all materials throughout each stage of the manufacturing process to ensure all standards are met. NDT is predominantly used in applications or industries that could affect human life as opposed to consumer products that don’t confer the same level of hazards.
