Hollowing your model
Making a hollow model is a common task in modeling for 3D printing. Indeed, it helps limit the amount of material used to what is strictly necessary, thereby limiting the cost of production. It is also essential for some materials (especially ceramics) which need constant thickness.
To hollow your model, you have several options.
With the hollowing function Sculpteo offers, you can easily hollow your model. Just upload your file to our site, then choose the location of the holes for material extraction and our algorithm does the rest, automatically adjusting wall thickness when you change material or scale.
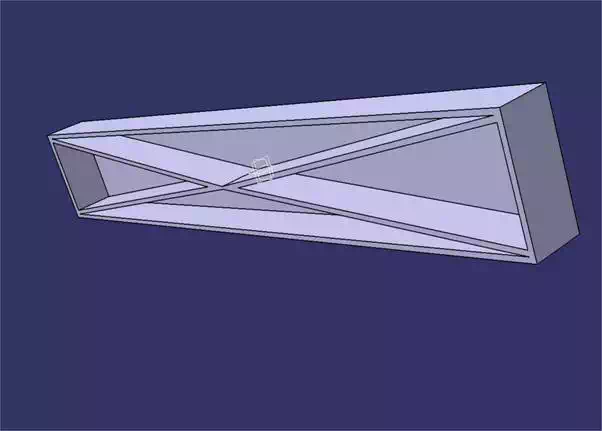
It may also be interesting to create your object with hollowed out areas that do not require significant resistance, using a pattern or hollowing non-uniformly (transparency effects, thicker and thinner areas, etc.). Simply use the standard functions of material removal. You can find some examples below. (But unlike Sculpteo's Hollowing, this will not adapt to changing materials or scales.)
· Structural removal

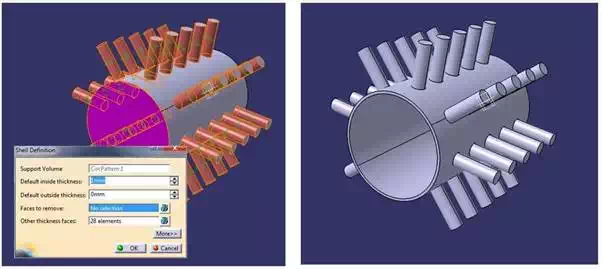
· Shell removal
If you want to hollow your model in more personalized way, CATIA also offers the "shell" function, fulfilling this role. You will have to choose one or more faces that are "opening out" and specify the wall thickness you want.

The "shell" tool also lets you select faces in different thicknesses. This allows you to manually change the thickness of these shells. This tool is useful when there are sensitive areas that we mustn't hollow out.

· Standard drill

If you use "shell" without selecting faces, remember to make two holes to allow the object to be emptied at the end of production. Without drain holes, an object, even with proper thickness, will be considered a solid object, because the blocked powder inside cannot be evacuated, though its strength will be slightly lower because it will be full of "unfused" dust. Keeping drain holes is particularly important. To learn more about the diameter of the holes to be made depending on the material used, consult our materials pages.