How to Make a Lead Screw Nut for a CNC Machine
This tutorial will show you how I made the 5 start 2 TPI lead screw nuts for my CNC. Other types of lead screw nuts with a different number of starts or TPI could also be made the same way.
I’d say that I’ve put about 50 hours of use on my DIY lead screws. They seem to be holding up fine so far, but I will have to test them for many more hours before I’d recommend them 100%.
You can of course just buy your lead screw nuts, but if you’re a DIYer you can take a stab at making your own.
For this tutorial, I’m using two pieces of plastic with the dimensions 1 1/2″ x 2 1/2″ x 3/4″. These dimensions are only being used as an example and probably need to be changed to work with your machine. Make sure you figure out a way of attaching the lead screw nuts to your machine before you go to the trouble of making them.
The plastic I’m using here comes from a piece of exterior trim. I don’t know what kind it is, but I think you could make a lead screw nut out of a variety of different types of plastic. You can see from the pictures below that the plastic is slightly porous. I don’t know if it matters or not though because I know next to nothing about plastic.
The plastic I used here didn’t give off any toxic fumes when I molded it on the lead screw threads, but yours might, so you may want to make it outside.
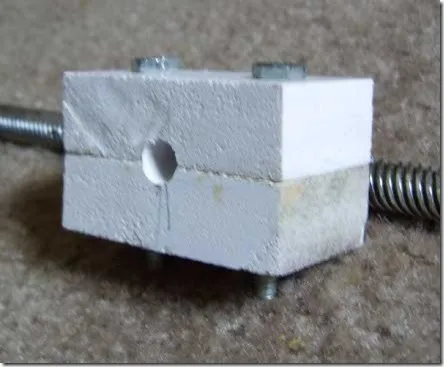
As you can see in the picture below, there are two pieces of plastic bolted one on top of the other.
With the plastic held together by the bolts, drill a hole through the center of the two joined pieces. The hole I made here is 3/8″ in diameter.
Place the lead screw between the two pieces of plastic like you see in the picture below.
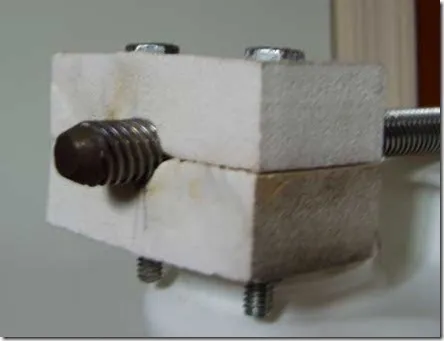
1. Evenly heat up the last couple of inches on the lead screw with a lighter. (This would be a lot faster with a blow torch. Just don’t get it too hot or you may end up over melting the plastic.)
2. Once it’s nice and hot, move the plastic to the end of the lead screw and tighten the nuts down a little bit. You have to move quickly here so you don’t lose too much heat. Keep in mind that if you tighten the nuts too much and too fast your threads won’t come out right.
3. Twist the plastic back and forth to help mold the plastic to the shape of the lead screw.

[bad]
You will need to repeat the above three steps several times until both pieces of plastic are touching each other like in the picture below.
Once the plastic is clamped together, you may want to loosen the nuts on the bolts some to insure your new lead screw nut is able to turn easily. It would be a good idea to add a second nut to each bolt and tighten it against the first to keep it from coming apart over time.
Also, it might not be a good idea to take the two pieces of plastic apart after you’ve molded the threads into them. If you did, you might damage the threads by either putting the two pieces of plastic back together in the wrong direction or by maligning
them.