Measuring Resistance,
In Circuit and Out
The resistor
is the fundamental electronic component. By resisting the flow of electrons in
a simple and predictable way, a resistor allows the designer to easily
manipulate currents and voltagesóand currents and voltages are what circuits
are all about.
Before You Measure
The resistance, or simply the
ďvalueĒ of a resistor determines how it will influence the circuit to which it
is connected. You need to know the resistance of your resistorósometimes the
approximate value is fine--but sometimes you need precision. The value of a
resistor is usually indicated on the component itself, with either
old-fashioned colored bands or printed
numerals. But these are nominal values, meaning that the actual resistance can
be a certain percentage higher or lower than this indicated value. If the
tolerance of the resistor is 10%, for example, a ď1000 ohmĒ resistor could
actually be anywhere between 900 and 1100 ohms.
Why Measure?
So if the resistance value
is labeled right there on the resistor, why
would you need to measure? There are two reasons: first, you may not be able to
confidently determine the resistance from the labelómaybe the component is old
and the label is faded, or maybe you donít understand the color code. Second, you may need to know the exact
value of a specific resistor, not the nominal value. A high-precision circuit
requires high-precision components. If the reference voltage for an analog-to-digital converter is determined by an external
resistor, you need to know the exact value of that resistor in order to
accurately interpret your digitized measurements.
Know the Law
The most basic law describing
the flow of electric current is Ohmís law, which relates voltage (V) and
current (I) to resistance (R):

In other words, the voltage
supplied to a circuit is equal to the current flowing through the circuit
multiplied by the total resistance of the circuit. Another way to express this
same relationship is

This means that the current
flowing through a circuit is equal to the voltage supplied to the circuit
divided by the total resistance of the circuit.
Ohmís law applies not only to
entire circuits but also to individual components. With a resistor, energy is
dissipated as current flows through the resistive material, and this energy
loss is manifested as a voltage drop, which is the difference between the
voltages at the two terminals of the resistor. Thus, Ohmís law provides the
essential approach to measuring the value of a resistor: if you know the
voltage drop across the resistor and the current flowing through the resistor,
you know the resistance.
The Easy Way
The most common and simplest
way to measure resistance is with a digital multimeter,
or DMM. This indispensable device knows all about Ohmís law and is happy to do
the work for you: when you connect the terminals of the resistor to the two
probes, it supplies a known current, measures the resulting voltage drop, and
calculates the resistance. The trouble is, this approach only works if you can
take your resistor out of the circuit; the DMMís reading cannot be trusted if
the resistorís terminals are connected to other components. So if you need to
know the value of a resistor that cannot be isolated from other components, you
will have to be more creative.
The Not-So-Easy Ways
Regardless of the specific
circumstances of a particular resistance measurement, the fundamental strategy
remains the same: determine current and voltage, then calculate resistance. So
the goal in determining the value of a resistor embedded in a circuit is to
somehow measure the voltage drop across that resistor and the current flowing
through it.
Voltage drop can be measured
simply by connecting the two DMM probes to the two terminals of the resistor
(remember that the circuit must be powered on for this to work). Measuring
current, however, is not so simple. To measure current, the DMM must be
connected in series with the current flowing through the resistoróin other
words, the current flowing through the resistor must go in one DMM probe,
through the DMMís measurement circuitry, and out the other probe. This means
that you have to find a convenient way to break the resistorís current path and
then connect the two DMM probes to the two sides of this open circuit; look at
connectors, jumpers, and easily removable components as possible places to
insert the DMM into the current path. Mini-grabber test clips are often very
helpful in this task.

If you cannot find a way to
use a DMM to measure the current flowing through the resistor, there is another
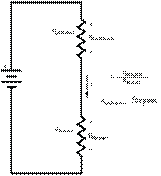
somewhat more complicated option: first, get another resistor and measure its
exact value using the DMM. Then you need to find a way to insert this resistor
into the circuit so that it is in series with the resistance you are trying to
measure. Because the two resistors are in series, you know that the same
current flows through both. Measure the voltage drop across the new resistor,
then use Ohmís law to calculate the current. This same current is flowing
through the original resistor, so after you measure the voltage drop across the
original resistor, you can use Ohmís law to calculate its resistance.
