Document Views
Document Views in Word: Overview
You can easily switch document views in Word. The document view buttons appear in the lower-right corner of the application, to the left of the “Zoom” slider, on the Status Bar. They also appear in the Ribbon, under the “View” tab in the “Views” button group. Clicking any of these buttons changes the working view of your document. You can then switch to a different view by clicking another view button.
The default, and most common, document view is the “Print Layout” view. This view lets you see the document as it appears when printed. This view shows margins, page breaks, and also header and footer information. The other available document views are “Read Mode,” “Web Layout,” “Outline,” and also “Draft.”
You can choose “Read Mode” to maximize the amount of space available for reading the document. This view helps you electronically read and review a document. You can choose the “Web Layout” view when creating documents intended for web publishing. The “Outline” view helps you organize ideas in a hierarchy. You can use “Draft” view to focus on the body of text that comprises the majority of most documents. Other additional information, like the margins, or the header and footer data, does not appear in “Draft” view.
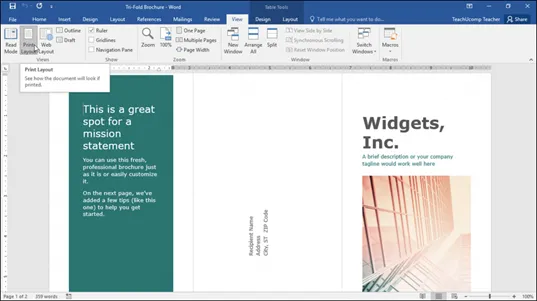
Document Views in Word- Instructions and Video Lesson: A picture of the document view buttons on the “View” tab of the Ribbon in Word.
Note that the “Outline” and “Draft” view buttons only appear in the “View” tab of the Ribbon. The “Read Mode,” “Print Layout” and ”Web Layout” views have buttons in both the “View” tab and the Status Bar.
Document Views in Word: Instructions
1. To change document views in Word, click the “View” tab in the Ribbon.
2. Then click a button in the “Views” button group to switch between the available views.
3. “Read Mode” view maximizes the available space to easily read your document.
4. “Print Layout” is the default view and shows how your document appears when printed. It also shows margins, page breaks, and header/footer information.
5. “Web Layout” view helps you create documents for the web.
6. “Outline” view helps you organize ideas in a hierarchy, like an outline or agenda.
7. “Draft” view focuses on the body of text that makes up your document. No other information, like margins or pages breaks, appear.
8. To change the document view to “Read Mode,” “Print Layout” or “Web Layout,” you can also use the document view buttons in the Status Bar.