Vocals…it’s the one thing we all record.
And it’s the one thing all listeners hear.
Therefore…it demands our best work.
But with all the knowledge, gadgets, and techniques it requires…
It can feel overwhelming for beginners especially early on.
The good news is, with a just few simple tips…
Virtually anyone can SIGNIFICANTLY improve their sound in almost no time at all.
So in today’s post, I’ll share with you the best tips I know.
Starting with…
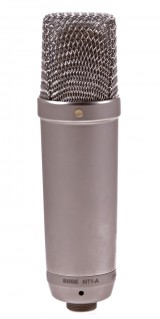
These days, good vocal mics can be bought CHEAP…
For only a few hundred dollars, which is well within reach of average home studios, you’ll have your pick among dozens of great options.
In many ways, a good vocal sound comes LESS from employing fancy techniques, and MORE from avoiding common problems.
Specifically, these 5:
1. Popping
2. Sibilance
3. Proximity Effect
4. Foot Noise
5. Poor Room Acoustics
Now let’s explore each one further…
 One strange thing about the human voice is…
When pronouncing “P” and “B” sounds, a strong blast of air is expelled from the mouth.
In normal speech you don’t even notice it.
But on recordings, these air blasts strike the diaphragm of the mic…
Creating a punchy low frequency sound known as Popping.
To understand it better, try this exercise:
Place your hand in front of your face as you say these two sentences:
Peter Piper picked a peck of pickled peppers.
Better businesses build big boxes.
Feel the air hitting your hand? That’s popping.
To avoid it, the easiest way is to sing into the mic at a slightly off-axis angle, so the blasts don’t strike the diaphragm directly.
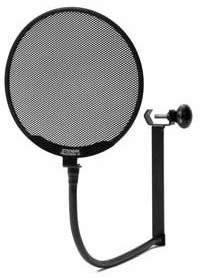
However…since many singers can’t or won’t do it, engineers often use pop filters instead.
Here’s how they work:
1. By creating a barrier between the singer and the mic, pop filters act like a net to catch “plosives“, while allowing other sounds to pass freely.
2. The barrier also acts as a distance marker, preventing singers from moving in too close, as they often will.
2. Sibilance
The OTHER strange thing about the human voice is…
When pronouncing “S” and “F” sounds, the mouth emits a high frequency blast of air, commonly known as sibilance.
You don’t notice it in daily conversation…
But on recordings, when your mouth is right up against the mic, it often sounds painfully obvious.
Let’s do another demonstration:
Using a condenser mic (which is more prone to sibilance), record yourself saying this line:
She sells sea shells by the sea shore.
Now listen back and pay close attention to the “S” sounds. Hear that annoying hiss? That’s sibilance.
To fix this problem, you COULD just mask it with software tools like de-essers and multi-band compressors…
But the smarter strategy is to avoid recording it in the first place. Just like with popping, singing at an off-axis angle can USUALLY fix the problem.
 If not though, here’s something else you can try:
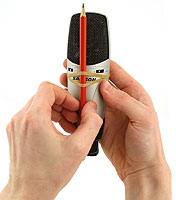
The Pencil Trick.
Grab a pencil, and secure it directly over the diaphragm of your mic with a rubber band, as shown in this picture.
Now…those high frequency blasts will be split in half by the pencil, and diverted off to the side. Problem solved.
Moving on…
3. Proximity Effect

Due to the design of the cardioid mics…
Which is the standard polar pattern used on vocals…
Whenever a sound source is located within a few inches of the diaphragm…
The microphone exhibits a noticeable low-end boost in its frequency response.
The closer the sound, the stronger the effect.
With certain instruments such as acoustic guitar, this can serve as a useful tool in adding warmth.
On vocals however, when inexperienced singers use it unintentionally…
It can be extremely annoying to hear that low end boost appear and disappear at random.
If your singer is having this problem, here’s how you fix it:
1. Use a pop filter – to prevent the singer from getting too close to the mic.
2. Use omnidirectional mics – which are immune to proximity effect because of their design.
Up next…
4. Poor Room Acoustics
 You could do EVERYTHING ELSE perfectly…
But the fact is…
If the acoustics in your room suck, so will your vocals.
And without proper acoustic treatment, you can pretty much guarantee that your studio’s acoustics WILL suck.
So if you don’t have any yet, make it your top priority. Here’s an article to help you get started:
If you don’t have the money or space to do it the traditional way…
Reflection filters can be a good cheap alternative for anyone in search of a shortcut. They may not work as well as “real” acoustic treatment…but they’re a thousand times better than nothing at all.
5. Foot Noise
 With certain flooring…
Every single footstep can be heard loud and clear throughout the entire house.
When singers tap their feet, those vibrations travel up your mic stand, and onto the recording.
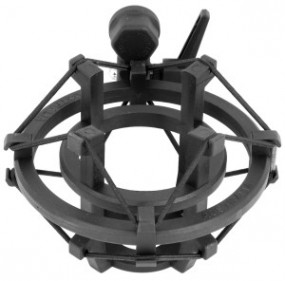
The common solution to this problem is to add a shockmount, which works by creating acoustic isolation between the mic and the stand.
To find out if YOU need one, here’s what you do:
1. Setup your mic as you normally would, record enable the track, and crank up the gain.
2. Put on your headphones, walk around the mic stand, and listen.
If you hear your footsteps or any other floor noise, you could probably benefit from a shockmount.
While many vocal mics come with one included, if yours doesn’t, here’s what you do:
Because most shockmounts are designed to work only with a specific mic, you need to find the right match.
Try Googling something like “shockmounts compatible with your mic” and if one exists, you’ll know. If not, you might want to try using a different mic altogether.