Listing directories and files used by the emulator
You can discover where files are located in two ways:
Ø When you start the emulator from the command line, use the -verbose or -debug init option, and look at the output.
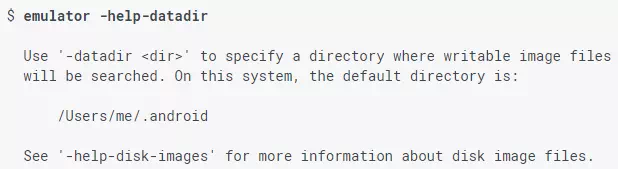
Ø Use the emulator -help-option command to list a default directory. For example:
Command-line startup options
This section lists options you can supply on the command line when you start the emulator.
Note: The Android Emulator is continually under development to make it more reliable. For status on the issues reported against various command-line options, and to report bugs.
Commonly used options
The following table lists command-line startup options that you might use more often.
|
Command-Line Option |
Description |
|
Quick Boot |
|
|
-no-snapshot-load |
Performs a cold boot, and saves the emulator state on exit. |
|
-no-snapshot-save |
Performs a quick boot if possible, but does not save the emulator state on exit. |
|
-no-snapshot |
Disables the Quick Boot feature completely—it does not load or save the emulator state. |
|
Device Hardware |
|
|
-camera-back mode |
Set the emulation mode for a camera facing back or front. It overrides any camera setting in the AVD. mode can be any of the following values: · emulated - The emulator simulates a camera in the software. · webcamn - The emulator uses a webcam connected to your development computer, specified by number. For a list of webcams, use the -webcam-list option; for example, webcam0. · none - Disable the camera in the virtual device. For example: $ emulator @Nexus_5X_API_23 -camera-back webcam0 |
|
-webcam-list |
List the web cameras on your development computer that are available for emulation. For example: $ emulator @Nexus_5X_API_23 -webcam-list List of web cameras connected to the computer: Camera 'webcam0' is connected to device 'webcam0' on channel 0 using pixel format 'UYVY' In the example, the first webcam0 is the name you use on the command line. The second webcam0 is the name used by the OS on the development computer. The second name varies depending on the OS. As of SDK Tools 25.2.4, the AVD name is required, although it might not be in the future. |
|
Disk Images and Memory |
|
|
-memory size |
Specify the physical RAM size from 128 to 4096 MBs. For example: $ emulator @Nexus_5X_API_23 -memory 2048 This value overrides the AVD setting. |
|
-sdcard filepath |
Specify the filename and path to an SD card partition image file. For example: $ emulator @Nexus_5X_API_23 -sdcard C:/sd/sdcard.img If the file isn't found, the emulator still launches, but without an SD card; the command returns a No SD Card Image warning. If you don't specify this option, the default is sdcard.img in the data directory (unless the AVD specifies something different). |
|
-wipe-data |
Delete user data and copy data from the initial data file. This option clears the data for the virtual device and returns it to the same state as when it was first defined. All installed apps and settings are removed. For example: $ emulator @Nexus_5X_API_23 -wipe-data By default, the user data file is userdata-qemu.img and the initial data file is userdata.img, both residing in the data directory. The -wipe-data option doesn't affect the sdcard.img file. |
|
Debug |
|
|
-debug tags |
Enable or disable the display of debug messages for one or more tags. Separate multiple tags by a space, comma, or column. For example: $ emulator @Nexus_5X_API_23 -debug init,metrics To disable a tag, place a dash (-) in front of it; for example, the following option displays all debug messages, except the ones related to network sockets and metrics: -debug all,-socket,-metrics For a list of tags and descriptions, use the -help-debug-tags option. For example: $ emulator -help-debug-tags You can define the default debug tags in the ANDROID_VERBOSE environment variable. Define the tags you want to use in a comma-delimited list. Here's an example showing it defined with the socket and glestags: ANDROID_VERBOSE=socket,gles It's equivalent to using: -debug-socket -debug-gles |
|
-debug-tag |
Enable a specific debug message type. Use the no form to disable a debug message type. For example: $ emulator @Nexus_5X_API_23 -debug-all -debug-no-metrics For a list of tags, use the emulator -help-debug-tags command. |
|
-logcat logtags |
Enable the display of logcat messages for one or more tags, and write them to the terminal window. For example, the following command enables error messages from all components: $ emulator @Nexus_5X_API_23 -logcat *:e logtags uses the same format as the adb logcat logtags command (enter adb logcat -help for more information). It's a list of space- or comma-separated log filters of the formatcomponentName:logLevel. componentName is either a wildcard asterisk (*) or a component name, such as ActivityManager, SystemServer, InputManager, WindowManager, and so on. logLevel is one of these values: · v - verbose · d - debug · i - informative · w - warning log level · e - error · s - silent The following example displays GSM component messages at the informative log level: $ emulator @Nexus_5X_API_23 -logcat '*:s GSM:i' If you don't supply the -logcat option on the command line, the emulator looks for theANDROID_LOG_TAGS environment variable. If ANDROID_LOG_TAGS is defined with a valid logtags value and isn't empty, the emulator uses its value to enable logcat output to the terminal by default. You can also redirect the same, or other, log messages to the terminal through adb |
|
-show-kernel |
Display kernel debug messages in the terminal window. For example: $ emulator @Nexus_5X_API_23 -show-kernel One use of this option is to check that the boot process works correctly. |
|
-verbose |
Print emulator initialization messages to the terminal window. For example: $ emulator @Nexus_5X_API_23 -verbose It displays which files and settings are actually selected when starting a virtual device defined in an AVD. This option is the same as specifying -debug-init. |
|
Network |
|
|
-dns-serverservers |
Use the specified DNS servers. servers is a comma-separated list of up to four DNS server names or IP addresses. For example: $ emulator @Nexus_5X_API_23 -dns-server 192.0.2.0,192.0.2.255 By default, the emulator tries to detect the DNS servers you're using and sets up special aliases in the emulated firewall network to allow the Android system to connect directly to them. Use the -dns-serveroption to specify a different list of DNS servers. |
|
-http-proxy proxy |
Make all TCP connections through a specified HTTP/HTTPS proxy. If your emulator must access the internet through a proxy server, you can use this option or the http_proxy environment variable to set up the appropriate redirection. For example: $ emulator @Nexus_5X_API_23 -http-proxy myserver:1981 proxy can be one of the
following: The http:// prefix can be omitted. If this option isn't supplied, the emulator looks up the http_proxy environment variable and automatically uses any value matching the proxy format. |
|
-netdelay delay |
Set network latency emulation to one of the following delay values in milliseconds: · gsm - GSM/CSD (min 150, max 550). · hscsd - HSCSD (min 80, max 400). · gprs - GPRS (min 35, max 200). · edge - EDGE/EGPRS (min 80, max 400). · umts - UMTS/3G (min 35, max 200). · hsdpa - HSDPA (min 0, max 0). · lte - LTE (min 0, max 0). · evdo - EVDO (min 0, max 0). · none - No latency, the default (min 0, max 0). · num - Specify exact latency. · min:max - Specify individual minimum and maximum latencies. For example: $ emulator @Nexus_5X_API_23 -netdelay gsm The emulator supports network throttling (limiting the maximum network bandwidth, also called network shaping) as well as higher connection latencies. You can define it either through the skin configuration, or with the ‑netspeed and -netdelay options. |
|
-netfast |
Disable network throttling. For example: $ emulator @Nexus_5X_API_23 -netfast This option is the same as specifying -netspeed full -netdelay none. These are the default values for these options. |
|
-netspeed speed |
Set the network speed emulation. Specify the maximum network upload and download speeds with one of the following speed values in kbps: · gsm - GSM/CSD (up: 14.4, down: 14.4). · hscsd - HSCSD (up: 14.4, down: 57.6). · gprs - GPRS (up: 28.8, down: 57.6). · edge - EDGE/EGPRS (up: 473.6, down: 473.6). · umts - UMTS/3G (up: 384.0, down: 384.0). · hsdpa - HSDPA (up: 5760.0, down: 13,980.0). · lte - LTE (up: 58,000, down: 173,000). · evdo - EVDO (up: 75,000, down: 280,000). · full - No limit, the default (up: 0.0, down: 0.0). · num - Specify both upload and download speed. · up:down - Specify individual up and down speeds. For example: $ emulator @Nexus_5X_API_23 -netspeed edge The emulator supports network throttling (limiting the maximum network bandwidth, also called network shaping) as well as higher connection latencies. You can define it either through the skin configuration, or with the ‑netspeed and -netdelay options. |
|
-port port |
Set the TCP port number that's used for the console and adb. For example: $ emulator @Nexus_5X_API_23 -port 5556 The default value is 5554 for the first virtual device instance running on the your machine. A virtual device normally occupies a pair of adjacent ports: a console port and an adb port. The console of the first virtual device running on a particular machine uses console port 5554 and adb port 5555. Subsequent instances use port numbers increasing by two — for example, 5556/5557, 5558/5559, and so on. The range is 5554 to 5682, allowing for 64 concurrent virtual devices. The port assignments are often the same as specifying -ports port,{port + 1}. {port + 1} must be free and will be reserved for adb. If any of the console or adb ports is already in use, the emulator won't start. The ‑port option reports which ports and serial number the virtual device is using, and warns if there are any issues with the values you provided. In the emulator UI, you can see the console port number in the window title, and you can view the adb port number by selecting Help > About. Note that if the port value is not even and is in the range 5554 to 5584, the virtual device will start but not be visible when you use the adb devices command if the adb server starts after the emulator. For this reason, we recommend using an even console port number. |
|
-ports |
Set the TCP ports used for the console and adb. For example: $ emulator @Nexus_5X_API_23 -ports 5556,5559 The valid ports range is 5554 to 5682, allowing for 64 concurrent virtual devices. The -ports option reports which ports and serial number the emulator instance is using, and warns if there are any issues with the values you provided. We recommend using the -port option instead, where possible. The -ports option is available for network configurations that require special settings. For more information about setting console and adb ports, see the -port option. |
|
-tcpdump filepath |
Capture network packets and store them in a file. For example: $ emulator @Nexus_5X_API_23 -tcpdump /path/dumpfile.cap Use the option to begin capturing all network packets that are sent through the virtual Ethernet LAN of the emulator. After, you can use a tool like Wireshark to analyze the traffic. Note that this option captures all Ethernet packets, and isn't limited to TCP connections. |
|
System |
|
|
-accel mode |
Configure emulator VM acceleration. For example: $ emulator @Nexus_5X_API_23 -accel auto Accelerated emulation works for x86 and x86_64 system images only. On Linux, it relies on KVM. On Windows and Mac, it relies on an Intel CPU and Intel HAXM driver. This option is ignored if you're not emulating an x86 or x86_64 device. Valid values for mode are: · auto - Determine automatically if acceleration is supported and use it when possible (default). · off - Disables acceleration entirely, which is primarily useful for debugging. · on - Force acceleration. If KVM or HAXM isn't installed or usable, the emulator won't start and prints an error message. For more information, see Configure Hardware Acceleration. |
|
-accel-check |
Check whether a required hypervisor for emulator VM acceleration is installed (HAXM or KVM). For example: $ emulator -accel-check For more information, see Determining whether HAXM or KVM is installed. |
|
-engine engine |
Specify the emulator engine: · auto - Automatically select an engine (default). · classic - Use the older QEMU 1 engine. · qemu2 - Use the newer QEMU 2 engine. For example: $ emulator @Nexus_5X_API_23 -engine auto Auto-detection should choose the value that provides the best performance when emulating a particular AVD. You should use the -engine option for debugging and comparison purposes only. |
|
-gpu mode |
Select the GPU emulation mode. For example: $ emulator @Nexus_5X_API_23 -gpu swiftshader_indirect For more information, see Configuring graphics acceleration on the command line. |
|
-no-accel |
Disable emulator VM acceleration when using an x86 or x86_64 system image. It's useful for debugging only and is the same as specifying -accel off. For example: $ emulator @Nexus_5X_API_23 -no-accel For more information, see Configure Hardware Acceleration. |
|
-nojni |
Disable extended Java Native Interface (JNI) checks in the Android Dalvik or ART runtime. For example: $ emulator @Nexus_5X_API_23 -nojni When you start a virtual device, extended JNI checks are enabled by default. For more information, see JNI Tips. |
|
-selinux {disabled|permissive} |
Set the Security-Enhanced Linux (SELinux) security module to either disabled or permissive mode on a Linux operating system. For example: me-linux$ emulator @Nexus_5X_API_23 -selinux permissive By default, SELinux is in enforcing mode, meaning the security policy is enforced. permissive mode loads the SELinux policy, but doesn't enforce it; it just logs policy violations. disabled mode disables kernel support for SELinux. |
|
-timezone timezone |
Set the timezone for the virtual device to timezone, instead of the host timezone. For example: $ emulator @Nexus_5X_API_23 -timezone Europe/Paris By default, the emulator uses the timezone of your development computer. Use this option to specify a different timezone or if the automatic detection isn't working correctly. The timezone value must be in zoneinfo format, which is area/location or area/subarea/location. For example: · America/Los_Angeles · Europe/Paris · America/Argentina/Buenos_Aires The specified timezone must be in the zoneinfo database. |
|
-version |
Display the emulator version number. For example: $ emulator @Nexus_5X_API_23 -version Or $ emulator -version |
|
UI |
|
|
-no-boot-anim |
Disable the boot animation during emulator startup for faster booting. For example: $ emulator @Nexus_5X_API_23 -no-boot-anim On slower computers, this option can significantly speed up the boot sequence. |
|
-screen mode |
Set emulated touch screen mode. For example: $ emulator @Nexus_5X_API_23 -screen no-touch mode can be any of the following values: · touch - Emulate a touch screen (default). · multi-touch - Emulate a multi-touch screen. · no-touch - Disable touch and multi-touch screen emulation. |